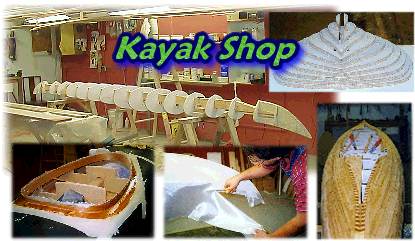
The most representative photos were chosen from different projects to illustrate every step of wood kayak building. You can click on every small photo to see the full sized and detailed version. The pages are organized chronologically where possible, or by task so you can start the tour from the beginning or go directly to the section of your interest and navigate from there. The content on these pages is constantly being updated and expanded. Index of Wood Strip Kayak Building Pages Index of "Stitch and Glue" - Plywood Kayak Pages |
Pages of interest | |
Abrasion Resistant Fabrics, Fiberglass & Carbon - Fabrics used in wood strip kayaks and for extra abrasion protection. See how Dynel, Olefin, Xynole and plain fiberglass compare in impact resistance. | |
The Epoxy test - Search for the best kayak clear coating epoxy. | |
Hydrostatics - Confused by Prismatic coefficient, %LCB or Vertical Center of Buoyancy? Click here for definitions of terms used in hull design and all One Ocean Kayaks technical specs. | |
Composite Sandwich Core - Mechanical principles behind this lightweight, yet amazingly strong structure. | |
Building Cost Estimate - construction cost for the Cape Ann Double. Estimating kayak cost. | |
Wood Strip Calculator - How much wood strip material you need for your craft ? (based on boat surface area) | |
Kayak Builders' Gallery - See finished kayaks that others have built. | |
NEW | Stitch and Glue Kits - shave some time off the prep work with precut components |
If you want to find something specific, search this site. It works like One Ocean Kayaks search engine.
.top
INDEX of Wood Strip building pages
Builders of One Ocean Kayaks see additional material in the Builders' Pages.
- Indicates more related pages within a category
1. Setup for ripping strips & the ideal plank of cedar
1a. Jig for routing bead and cove strips
1b. Wood strips - problems to watch out for
2. Tools for stripping and fiberglassing
3. Making mold stations from plans
4. Preparation of mold assembly for stripping
4a. Aligning stations on spine
5. Kayak stripping basics
6. Stripping basics 2 - filling large areas the easy way
6a. Building 'pinched' keel - concave surfaces- The CA Expedition stern.
6b. Inlay technique for quick & accurate miter joints and accute angles
7. Artistic stripping -Decorative splines first, fill last
7a. Inlays - creating intricate inlays quickly without shaping strip ends. Fill first, splines last.
7b. CA Expedition - advanced deck inlays
7c. CA Expedition deck continued
8. Stem construction 1- building the kayak forefoot
8a. Stem construction 2- decorative deck tip
8b. Stem construction 3 - faster method yet.
9. Filling and sanding - preparation for fiberglassing
9a. Signage - adding lettering to your kayak.
10. Fiberglass cover - draping fiberglass fabric over kayak
10a. Filleting and glassing the inside kayak stems
11. Working with Epoxy - wet-out of fiberglass12. Fiberglassing continued
13. Sanding fiberglass & Trimming - splitting the kayak deck off the mold
14. Cockpit - cutout and rim construction
15. Coaming construction
16. Coaming 2 - bonding to deck and finishing
17. Buttplates (hip-plates)- anchors for a backrest
18. Minicel foam Kayak Seat & Backrest
- Cutting a seat from 3" foam block
- Shaping foam for custom fit
19. Hatches - cutting out
20. Hatches 2 - making composite seal-channel
21. Hatches 3 - bonding channel to deck
22. Hatches 4 - seal gasket and hardware
23. Bonding deck and hull together
23a. Bonding shells - neat fiberglass tape trim trick
24. Bulkheads
24a. Foot braces
- Fixed Yakima installation
- Sliding installation (for a rudder)
24b. Carry loops
- Making carbon tubing
- Making Carbon lashing hooks 1
- Graphite hooks 2
- Graphite hooks 3
25. Rudder block - Modification of the stern for a rudder
26. Rudder - mounting, cable control
- Cable-footbrace connection
- Making rudder cable loops
27. Varnishing - general precautions
27a.Varnishing - the tools and technique
28. Coating with two part polyurethane
.top
INDEX of Stitch & Glue building pages
Builders of Cirrus see additional material in the Builders' Pages.
1. About Plywood - what to look for in plywood
2. Scarfing - preparation of plywood panels for joining
3. Joining scarfed plywood sheets
3a. Butt-joining plywood - limited alternative to scarfing
3b. ScarfLOCK - joining of plates in S&G kits
4. Transfer of plans to plywood
5. Cutting kayak plates from plywood sheets
6. Stations - mounting and alignment of 'mold'
7. Strongback - setting up solid building foundation
8. Wiring hull plates # 1 and stations into the mold
9. Wiring side plates # 2
10. Filleting and filling pinholes - overview of technique for deck and hull11. Deck plates - "stitching" deck onto the kayak
12. Fiberglassing outside deck
13. Sanding and trim of glass on deck
14. Standard coaming rim installation
14a. Recessed coaming with knee braces
14b. Recessed coaming rim installation
15. Hull stem band and tips
16. Glassing outside hull
17. Glassing inside hull
18. Glassing inside deck
19. Bonding hull and deck together
20. Painting decorative stripe
Internet Explorer users click here to add this page to your favorites.
Netscape users press Ctrl D to Bookmark this page
Home Kayak Designs Kayak Shop Materials Kayak Gallery About us Building Manual Plans Sandwich Core Wood Kayak Order Epoxy Test Abrasion Cloth Rudder Resources Choosing Kayak Guestbook
If you notice any problems with the site (i.e. error links, missing images) please, let me know. Thanks
Mail:
Vaclav Stejskal
58 Wood Ln.
Acton, MA 01720
USA
Tel: 781-481-9261
© 1999
- 2024 Copyright Vaclav Stejskal
All rights reserved
Last page update:
9 May 2024